# Designing Flexible Partial Dentures with ExoCAD
## Introduction
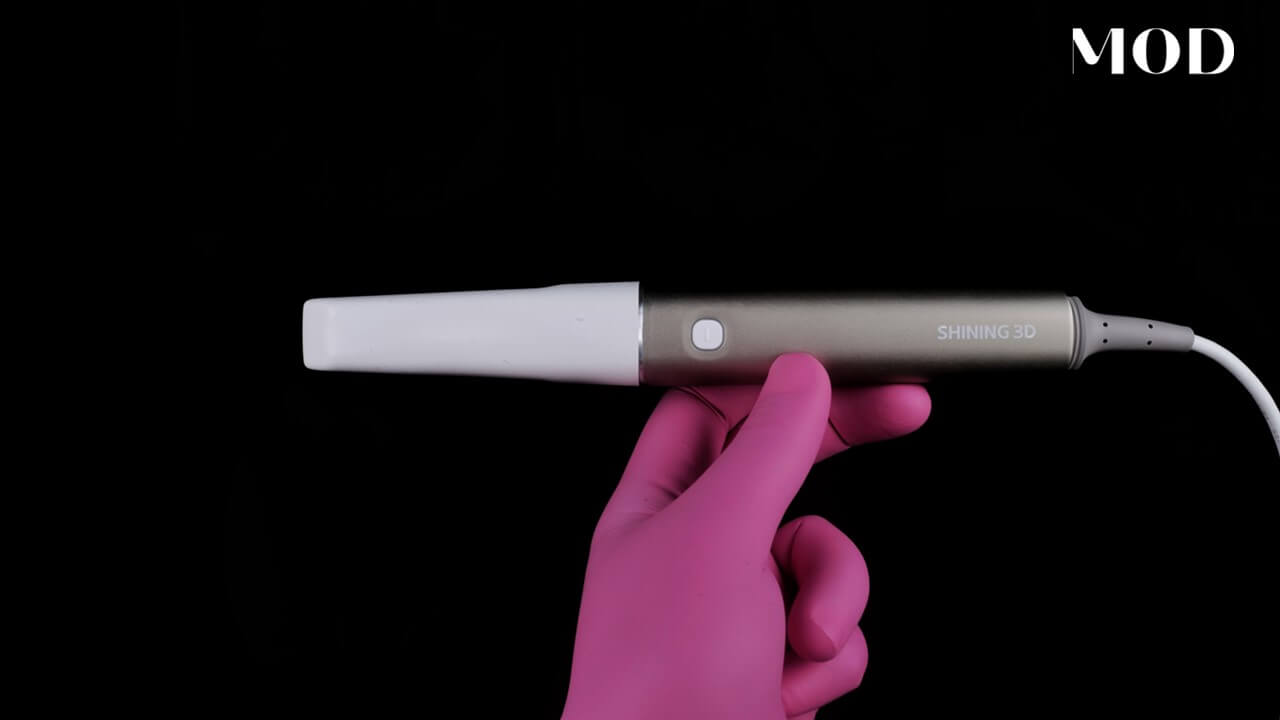
[0] Split file partial dentures are one of the most rewarding things that you could do for your patients because they're super easy to design. You could actually do them same day through the power of 3D printing, and we have some new materials that are more flexible on the market like retainer type materials, a clear liner style materials. For example, SprintRay retainer. You got graphite terahers. You have other types of materials that are being developed that are more flexible depending on how much you cure them per the IFU. You have two different cure cycles, one for flex, one for rigid. And this is a very exciting time to be doing these. So let me show you how we design them in ExoCAD.
## Designing the Denture
[30] I'm gonna go ahead and start with a default client. I'm gonna call this flex partial, and I'm just gonna go ahead and select tooth number eight. We're gonna call this now partial denture flexible denture all the way down here. And that is basically it. All of these other settings we don't need to mess with. We're gonna click okay. Now on the lower arch, we're gonna hit antagonist and click okay. We're gonna hit save and design. Let's load our files.
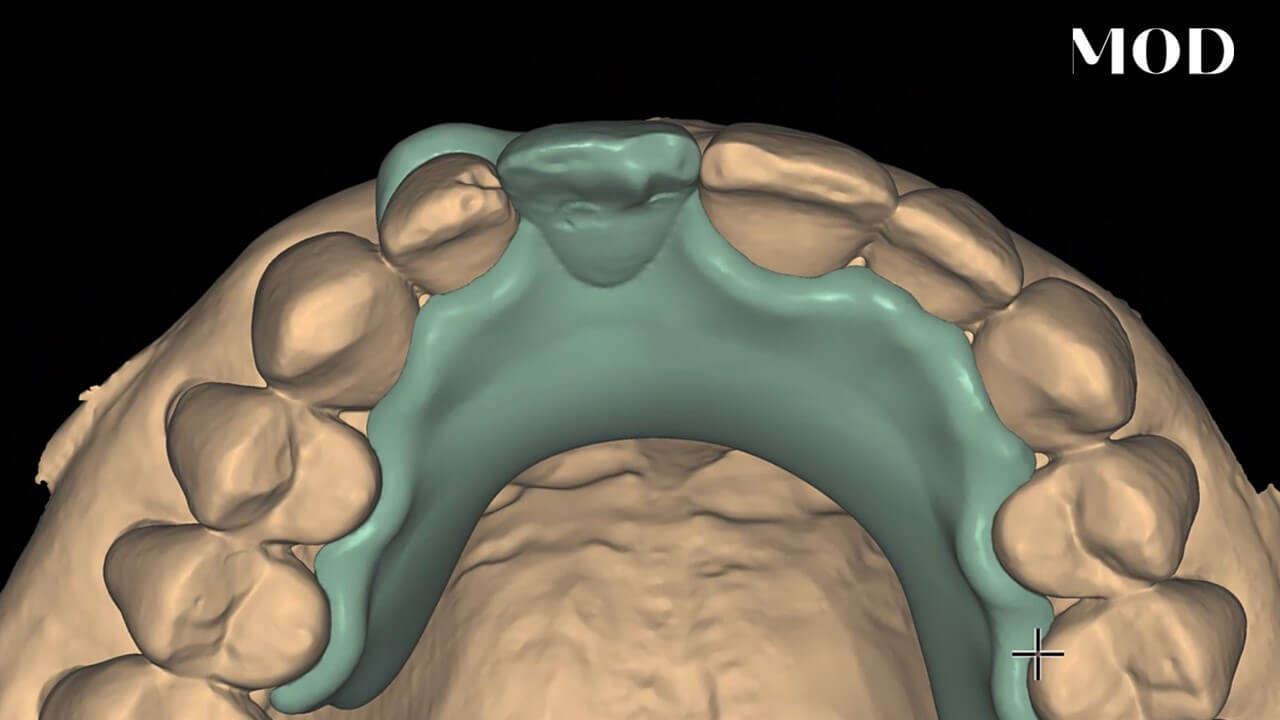
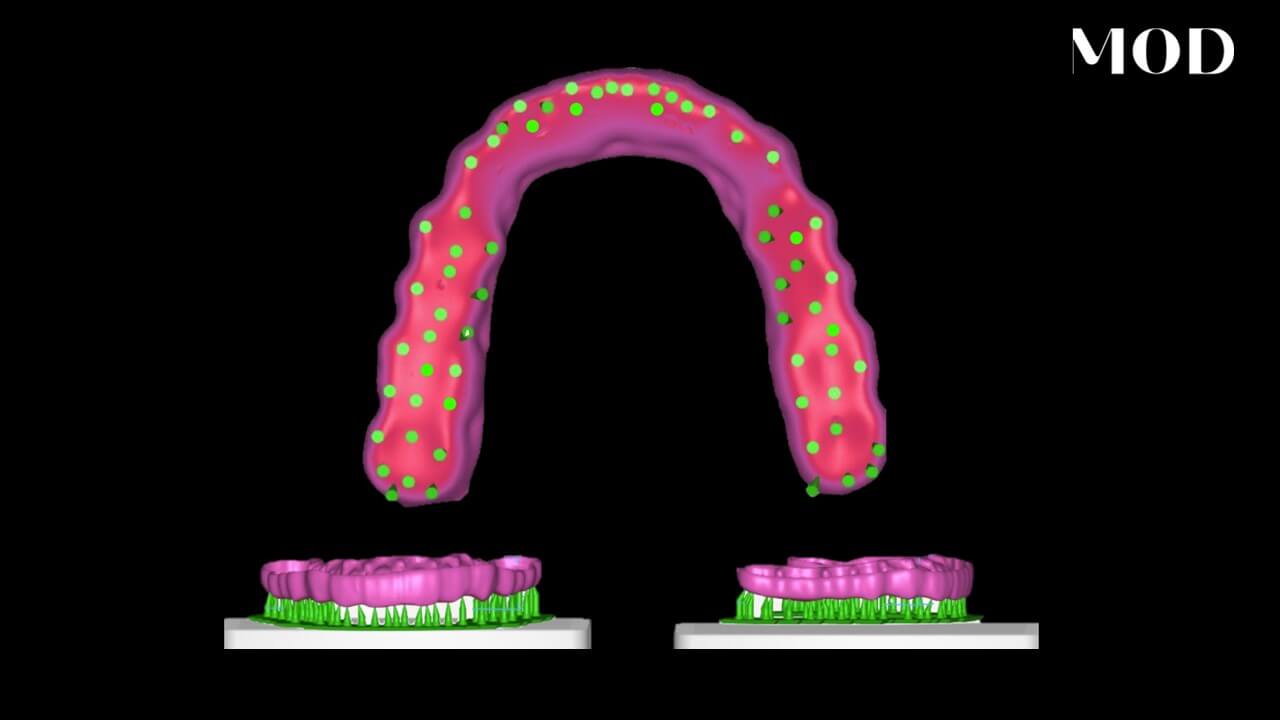
[80] Okay. So I'm gonna go and find my files on my desktop. Gonna rotate and look straight down onto the arch just like this. Now as a general rule, you wanna see just a little bit of the facial surfaces of the anterior teeth, but you wanna see all the occlusals of the posteriors like that and hit next. We're gonna pick the path of insertion of our partial denture. This is what's gonna determine the fit of your partial now. This little arrow right here represents the tilt of the partial denture and this salmon colored line represents the survey line. As if you put this on a surveyor and used a lead pencil to go around, this would be your survey line and the salmon color represents block out, wax, and undercuts.
[136] As a general rule, when you have a single edentulous space, you wanna look straight down that space and hit set from view. And you want to make sure that you have some areas of your guide plane that are not with block out wax, and you wanna make sure that you have an adequate area of undercut where you're gonna engage with your clasp. That's looking pretty good. I'm gonna just come a little bit more like that, set from view, and I'm golden. I'm gonna hit apply.
## Adjusting Properties
[167] Now what we need to do is let's look at our bottom properties. 30 micron spacer, 17% smoothing. That's fine. Undercuts, it's gonna allow up to a hundred microns at a zero degree angle. That's fine because what we're really gonna do is we're gonna go to our free forming tab, and we are gonna specifically add primary and secondary retention to this using the add remove tool and holding that shift button down. I'm gonna add primary retention to this lateral incisor here by melting back some wax all the way down to the original model. It will not let you go deeper than the original model.
[202] And then on the premolars, I'm gonna add secondary retention, 200 microns, which is this orange color, like that. You don't want pink. Pink is beyond the 200 micron color matte, and that is my secondary retention. So I got my primary retention with a flexible clasp coming in here and my secondary retention on the palatal area. And that is all you need for a very tight partial denture that's not gonna be dangerous to the adjacent teeth. I'm gonna hit next.
## Finalizing the Design
[233] It wants me to go ahead and wax a tooth into this location libraries, but instead, I'm gonna go to expert mode, right click on my model, my upper arch, and go to copy mirror. And I'm gonna go to mirror right here, direct copy, and I'm gonna click straight facial of tooth number nine, and it's going to then create a perfect little mirror image. And, look, I don't click my mouse. I just roll I just roll my mouse where I want the tooth to be, and it doesn't have to be perfect, and I go ahead and get it close and I click.
[265] Now it sets that tooth down, and I have the ability to control, to rotate it, drag it by clicking it and moving it. You could shift and grow and shrink it. You could also control shift and stretch it and expand it using control shift click. And with all those different tools, we're gonna get our tooth positioned where we want it typically with proximal contacts and everything just like that, and I'm gonna go ahead and click okay. Then I'm gonna go back to my wizard and we're at the free forming step.
[296] Let me go ahead and show you what we got here. We have our pontic sticking through our tissue. We got our occlusion and our proximal contacts. I'm gonna go ahead and hit cut all intersections. That's gonna cut and adapt my occlusion. It's gonna adapt my pontic so it's not sticking through anymore, and it's also gonna cut the proximal contact so they're not too heavy. More specifically, guys, if I go to my free adapt, it'll it'll show you the settings. Basal, which means pontic pressure is zero, which means if I slice going to my cut view right here, it's just barely touching the tissue. Zero pressure.
## Dynamic Occlusion
[376] That's perfect. One thing that we don't have, however, is dynamic occlusion, unfortunately. So what we need to do is go into expert mode, tools, articulator. If you have paid for the articulator module, it'll be right there. If you haven't, well, you don't get to do that. So then I'm gonna go ahead and go to automatically. I'm gonna hit a for antagonist, s to turn off my upper scan, and f as in oh, I can't hit f. I think it's different for partial dentures. I'm gonna turn off my anatomic shape.
[406] Click right here on the central incisor, tooth number 18 buckle, tooth number 31 buckle, and hit perform alignment. If you're wondering where I got those from, just read right here. It wants an incisal edge, patient's left molar, patient's right molar. You hit perform alignment. It's gonna place that arch in Balckwell's triangle right here, just like that, and then you click okay. If you have any intersections, go ahead and remove those intersections by hitting fix, and then hit start. I'm gonna hit move lower. Start movements.
[443] It's gonna go ahead and go through dynamic protrusion and lateral intrusion movements, and then you click okay. Now you notice we have this little menu bar up here. We're gonna jump back to wizard, and what's cool is we now have a dynamic button. So let me show you. And I could turn dynamic on and off. It looks pretty good. I'm gonna hit include healthy so we could see what's going on. Mine looks good already, but let me make it bad for you guys in case you have something that's not quite as good. I'm gonna add some interferences like that.
## Final Adjustments
[477] So let me show you how you could visualize this. I'm gonna turn on my lower by hitting a, turn off my dynamic, and I'll watch this. I have lower selected here. Look. I can now drag and go through protrusive movements here, and what I see is I am only hitting my wax up. That's that green color is much stronger than blue, so that's the only thing that's gonna be hitting. So if I want to adapt that automatically, what I like to do is go to my adapt dynamic, change the value to 220 microns, come down here and hit exclude parts, put my brush size on small.
[526] Oh, let me let me go back to 200 positive 220 microns. That means it's gonna be 220 microns out of occlusion in excursives. Exclude selected parts, put my brush size on small. Paint where I want my static occlusion to be, not altered. So maybe like right there. Now watch this. I have my dynamic on. I'm gonna hit this button right here, and it's gonna slice away all the excursives. Okay. So now check this out. If I turn off this dynamic prosthetic anymore. So I'm good. I'm gonna go ahead and hit next.
## Gingiva Design
[577] Now I need to draw my gingiva design. I'm gonna go ahead right here in the embrasure space of tooth number four. And then what's gonna be I'm gonna hide this border all the way into the rugae. Oh, I'm gonna undo a few dots there. I'm gonna swing up to this premolar, and I'm gonna do lingual plating. I'm gonna hit a to turn on my antagonist and make sure I'm not too close to those cusps and the opposing dentition there. Now I will tell you that you want to lingual plate with printing because it's much stronger.
[618] In addition to that, you want to be thicker than you might anticipate. So what does that mean? Well, I'm gonna show you some key metrics that you could live by for split file partial denture. Let me turn off this tooth. You could hold control on your keyboard and click the rolly ball down to get rid of something. I'm gonna go to my guide plan and go right at mid proximal here. Control shift and click the rolling ball to bring the tooth back. And I'm gonna go ahead and add some tissue.
[647] Now I'm gonna go here to my visualize wax up bottom and turn on my undercut cage so I could see where I'm putting my tip of my clasp. I'm gonna go right into here, and then I'm gonna follow this blue border right here. Now one thing I wanna tell you guys is with printed clasps and flexible clasps in the printing world, I wanna go ahead and show you a little tip. If I go to tools measurement, from here to here needs to be at least five millimeters. So I'm close, but I'm not quite there. That is where your clasp meets your minor connector here at your guide plane. So I'm gonna bring that up a little bit there and bring that up a little bit there, and let me try again.
[686] So now I'm at five millimeters. That is the thickness you need to avoid clasp fatigue and have that clasp snap. So I'm gonna exit out of my show distances again. So that's that's really a critical measurement, five millimeters here, which means you gotta go up on your tissue or up on your tooth. Get to the mid proximal. I'm gonna swing up, and now I'm gonna hit a to turn on my antagonist and just go ahead and finish my design. And double click that first ball. Design and double click that first ball.
## Finalizing the Prosthetic
[720] The thickness that you need for a split file is two millimeters. K? That's thick. We're gonna thin out some areas here coming up. So we got two millimeters. If you needed to edit something, you could drag a ball and hit apply, and it will change that. I'm gonna go ahead and hit next now. And what I need to do now is go to my free smooth flatten, hold my shift button down, and melt back my lingual border here to thin it out like that. And you might be tempted to thin air other areas out, but don't. You'll make a weak prosthetic. And then I need to thin my clasp tip.
[762] And I'm gonna melt back my clasp tip here at the tip where the blue, green, and orange are about the same thickness. See that? And then up here at the top hold on. Let me undo that. Where the lip might get caught up, I'm gonna smooth that. I will not let it go down beyond one millimeter thick. The way that you would smooth that is if you would hit uncheck this, keep bottom boundary fixed. Then you could smooth and feather that border just a little bit. Be very careful not to do that on your clasp tip. And you could do that here and feather that border without having a min thickness line.
[806] If you unclicked desired thickness, but you clicked keep bottom boundary fixed, it doesn't provide you with the same amount of freedom. Okay. Now that we have that, I'm actually going to go to my anatomic small region, and I'm just gonna go ahead and remove a little bit of this wax from the neck of the tooth right there, and just point the gingival zenith a little bit towards the distal like that. Perfect. We'll go ahead and hit next.
## Pocket Gap Settings
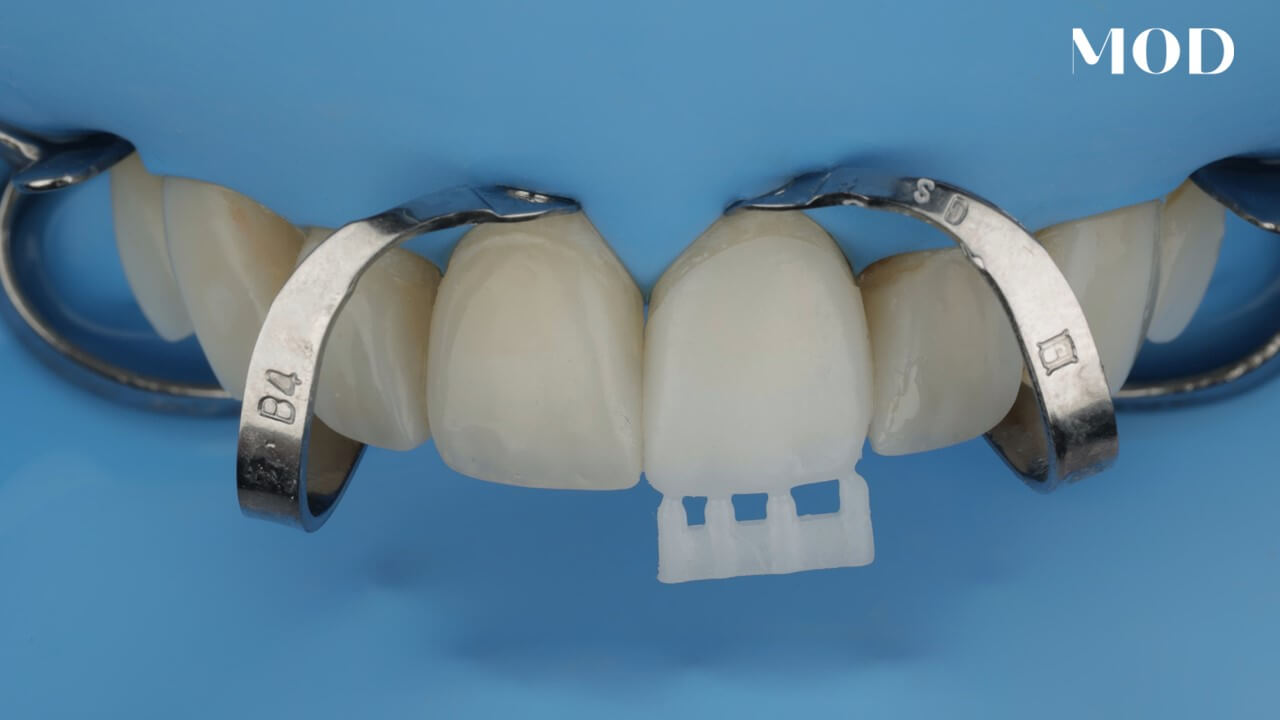
[838] Now we have our pocket gap settings. Underneath the tooth, the minimum thickness that I could have here in this tissue is one millimeter. If you go thinner than that, you'll break. It'll rip. Your pontic will rip off. So I'm gonna go up to one millimeter right here. The gap that I want is 200 microns because I want enough room for the resin cement, and I want passive fit of my tooth into this socket. Everything else remains the same for printing here. I'm gonna go ahead and show you guys. I'm gonna hit apply, and it's gonna go ahead and cut the socket, and it's gonna cut the tissue to fit. So there's my little socket.
[879] K. I'm gonna hit next, and we are done. I have a tooth, and oftentimes you'll see stuff like this for, path of insertion. But I have a perfect little tissue area with a clasp, and I have a tooth ready to be bonded into that area right there. And and if you have any areas like this where it hollows it out, don't be panicked. That could be filled in with tooth resin material when you bond the tooth into the socket.
## Final Steps
[907] Okay. That looks really good. So the next step for this particular case is to emboss the patient name. So I'm gonna go ahead and hit freeform and hit next. I'm gonna go to freeform gingiva. And I'm gonna go ahead and go to attachment, subtract, library, and I click all the way down to text. And in this box, I'm just gonna type the patient name right there. Come right over here, click, control to rotate, drag it, change your size to between four and five, thickness anywhere close to about point eight is what I like to do, and hit apply. You'll cut the patient's name into the rec into the base and hit next to save it.
[948] And there we go. Now we have the patient name in the prosthetic, and what you would do clinically is you flow some blue or white Empress Direct resin color into there and then polymerize it with the light. It's super easy to do. Alright. That is how we create a flex partial denture in a nutshell. I hope this guys this helps you guys. And as you could see, it's super easy to do.